RV adventures offer unparalleled freedom, but maintaining your motorhome on wheels is crucial. A leaky roof is a common issue, potentially leading to significant damage if not addressed promptly. Luckily, many repairs can be tackled as DIY projects, saving you money and getting you back on the road faster.
Understanding RV Roof Types
Before diving into repairs, it’s crucial to understand the different types of RV roofs. Whether it’s replacing rv roof or camper roof repair material, each material requires specific maintenance and repair techniques.
Rubber Roofs
Rubber roofs are common in many RVs due to their durability and cost-effectiveness. However, they are prone to tears and punctures over time, necessitating regular inspections and roof repair diy techniques.
Fiberglass Roofs
Fiberglass roofs offer superior strength and insulation but may develop cracks or delamination with age. Proper care and occasional resealing are essential to prevent leaks and rv roof damage.
Identifying Common RV Roof Issues
To effectively repair your RV roof, you must first identify the underlying issues. From repairing rv roof to how to fix a camper roof, here are some common problems you may encounter.
Water Intrusion
Water intrusion is perhaps the most prevalent issue faced by RV owners. Leaks can originate from damaged seals, cracked seams, or deteriorating roof materials, leading to extensive rv roof damage if left unchecked.
Sealant Deterioration
Sealants play a critical role in preventing water penetration around vents, seams, and edges. However, UV exposure and temperature fluctuations can cause sealants to degrade over time, compromising their effectiveness and requiring how to repair rv roof techniques.
Essential Tools and Materials
Before embarking on your DIY repair journey, gather the necessary tools and materials to ensure a smooth process. Here’s a comprehensive list of items you’ll need for rv roof maintenance and replacing camper roof:
Tools
- Caulking gun
- Putty knife
- Screwdriver set
- Utility knife
- Safety goggles
- Ladder
Materials
- Roof sealant
- Patching tape
- Roofing adhesive
- Rubber roof cleaner
- Seam tape
- Eternabond tape
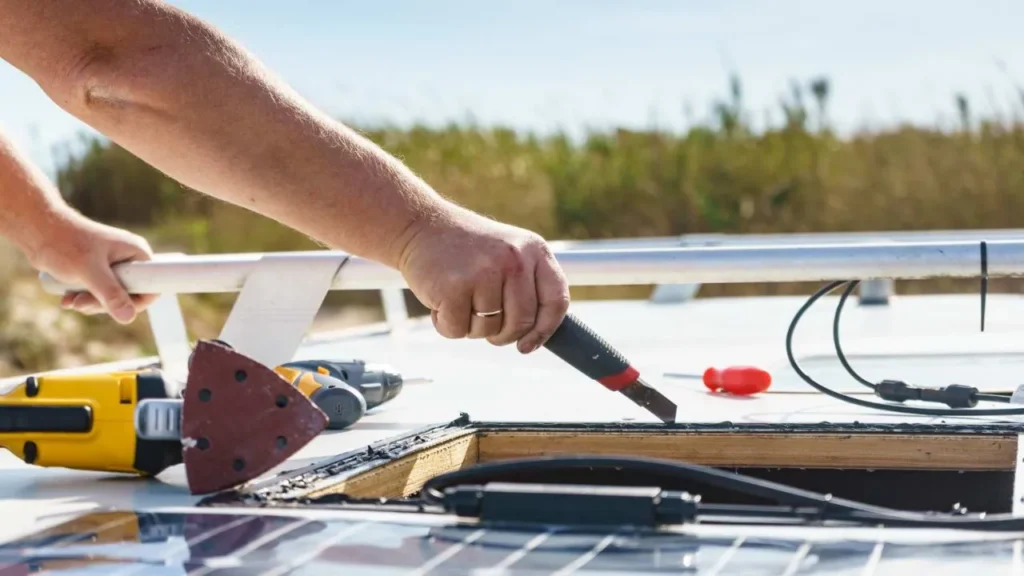
Step-by-Step DIY RV Roof Leak Repair Guide
1. Locate the Leak:
- Check inside your RV for water stains, mold, or dripping water.
- During or after rain, carefully inspect the roof for damp spots.
- Use a hose to spray water on the roof while someone checks inside for leaks.
2. Clean the Area:
- Thoroughly clean the area around the leak with a roof-specific cleaner.
- Remove any dirt, debris, or loose sealant.
- Allow the area to dry completely.
3. Repair the Leak:
- Small Punctures/Tears: Apply a generous amount of sealant directly over the damaged area, extending slightly beyond the edges. Smooth it out with a putty knife.
- Failed Seams: Remove any old sealant with a utility knife. Apply new sealant along the seam, creating a smooth, even bead.
- Damaged Vents/Appliances: Remove old sealant and reseal around the appliance base using appropriate sealant.
- Larger Repairs: If the leak is extensive, consider using a patch kit or EPDM tape. Follow the manufacturer’s instructions for application.
4. Sealant Curing:
- Allow the sealant to cure completely according to the manufacturer’s instructions.
- Avoid using the RV or exposing the repaired area to rain during the curing process.
RV Roof Maintenance Tips
Regular maintenance is essential to prolonging the lifespan of your RV roof and preventing costly repairs down the road. Incorporate these maintenance tips into your routine to keep your roof in top condition for rv roof repair:
- Regular Inspections: Inspect your RV roof at least twice a year, before and after storage.
- Cleaning: Wash your RV roof regularly with a mild soap and water solution to remove dirt and debris.
- Sealant Inspection: Check all sealants for cracks or gaps and reapply as needed.
- Covering: Consider using an RV cover when storing your RV to protect it from the elements.
When to Seek Professional Help
- Large-Scale Damage: If the leak is extensive or the roof is severely damaged, it’s best to consult a professional.
- Uncertainties: If you’re unsure about the repair process or the cause of the leak, seek expert advice.
Conclusion
Embarking on a DIY RV roof repair project may seem daunting at first, but with the right guidance and preparation, you can tackle it like a pro. By understanding the common issues, gathering the necessary tools and materials, and following a systematic repair process, you’ll be able to keep your RV roof in top condition for years to come.
FAQs
It's recommended to inspect your RV roof at least twice a year, preferably before and after the camping season.
While some household sealants may work temporarily, it's best to use specialized RV roof sealants designed for durability and weather resistance.
With the right tools, materials, and guidance, DIY RV roof repair can be manageable for beginners. Start with small repairs and gradually tackle more complex projects as you gain confidence.
The lifespan of RV roof sealant varies depending on factors such as weather exposure and maintenance. Generally, it's recommended to reseal your RV roof every 1-3 years for optimal protection.
Exercise caution when walking on your RV roof, especially if it's wet or slippery. Use a sturdy ladder and consider laying down plywood for added stability and weight distribution.
While it's not necessary to reseal your RV roof after every trip, it's essential to inspect it regularly for signs of damage or wear and address any issues promptly.